
Pantry Organization Ideas to Save Money Easy Pantry Makeover for Less Stress
- Shelly Tschupp
- Sep 15, 2022
- 5 min read
Updated: Sep 18, 2023

My pantry is deep, too deep, I can't find anything easily and I honestly don't have the time to empty it to figure out what I have before I buy groceries. Often I end up buying things I do not need and throwing out old food I forgot I had. To save money I decided to organize the pantry for easy access, use any existing materials I had and I even got so excited I added some cute labels too. Here is what I did, I hope it inspires you!
Pantry Organization Ideas:
Problem: pantry is too deep to locate items easily, not organized, the tiny section to store a broom doesn't hold the broom and my Swiffer cleaning products forcing storage in multiple areas of the home which is inconvenient, I find that I buy food I don't need and throw out forgotten expired / stale food, I have to pull out a dozen items to get to one item in the back, making grocery & meal lists takes too long so I don't bother.
Solutions: large bins that can be slid out containing grouped items, Tall and Stackable bins to easily use the entire height of the shelves, strategically placed full depth pullout trays; swapped the old bulky light fixture with a brighter led flush light to allow more storage on the top shelf, reconfigure cleaning area to fit more of what I use every day in the space, created two dispensers for my Swiffer dusters. Here is a slide show of what I did followed by the steps, enjoy!
Gallery of photos of this makeover, click the album arrows to get ideas for your own pantry makeover!


Here are the steps I took & a link to the items I bought: shopping list
Emptied the pantry, wiped/prepped/painted the walls & shelves with a much needed fresh coat using some left over paint from a prior bedroom project. Had my husband adjust the height of one shelf to allow me more storage as mine are stationary and I did not want to spend the money to replace the shelving.
I did buy new smooth top shelf liner in a beautiful gray damask pattern since what I had was in really bad shape and got a great price. I went with smooth top so that I could add baskets or bins and easily slide them out.
My original pantry light seemed small and bright when we bought it decades ago but it still blocked the centre of the top shelf and was actually quite yellow/warm. Today you can get flush mounted led lights gaining back that lost storage, they use less electricity, last for years and have multiple brightness settings too. So I replaced my old light with this one and it made a huge difference in brightening up this dark space.
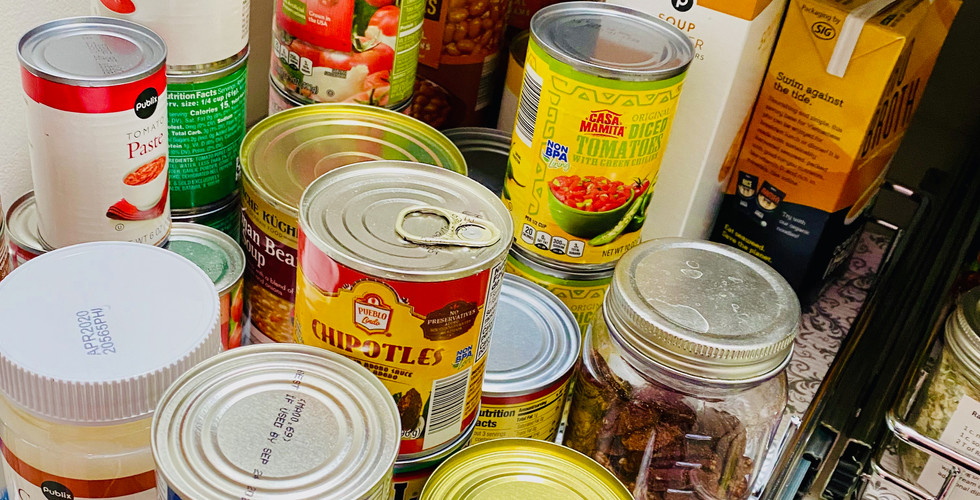
I then organized my pantry items on my dinning table into groups: Baking, Breakfast, Canned, Spice packs, Condiments, Dinner, Snacks etc. thinking about how we eat, what do we use most often, this gave me a good visual of the amount of space each group would need, and the weight required if I decided to use a basket, bin or pullout tray. Where would I store bulk items vs everyday use items? I bought some tall plastic containers to organize my dry goods too and was able to get more food in less space.
I then measured the empty pantry for storage options, I wanted bins or baskets that would fit well in the space and be strong enough to hold what would go in them. While I love the dollar store bins most would not hold the items I buy, they were either too small or too flimsy. I ended up spending a little more on heavier clear bins that fit the space perfectly and could hold the weights. I love mDesign bins, they cost more but last forever and can be used in the fridge and freezer too. Instead of pulling out dozens of items I now pull out just one bin or two and I have everything I need! My use of clear bins was a personal preference so that anyone could see what was in them and they could help to put away groceries, plus they have straight sides which means I can store a little more in them than I could with a basket. I also found some great full extension pullout heavy duty metal shelves that are attached on the bottom of the shelf vs the sides of a cabinet. It will take me 9 months to break even on the cost to do this vs what I will save by not buying duplicates or throwing out old food but I think it's worth the initial investment and definitely reduces some of my day to day stress with cooking.
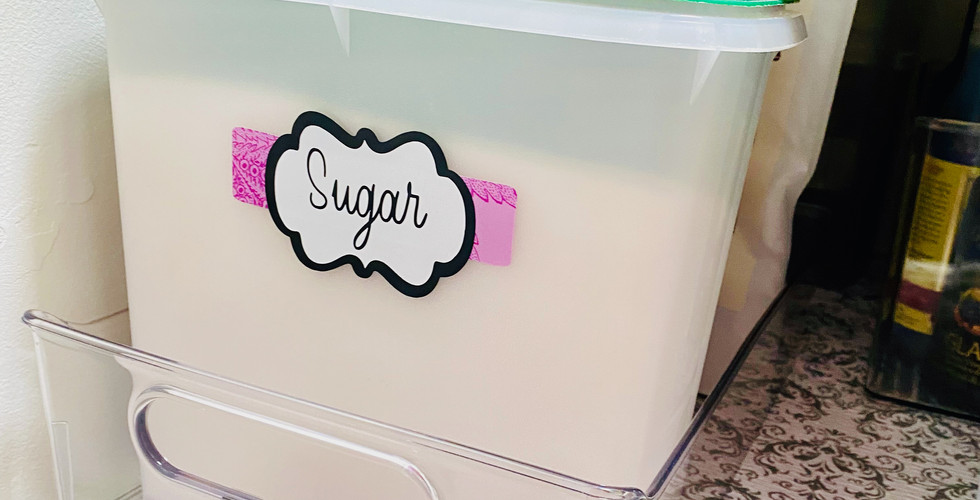
To make the pantry more presentable and just for fun I made some labels, as an avid crafter and artist I already had a Cricut machine and used left over materials from another project for the labels to save money. If you don't have a Cricut or Silhouette etc.. you may have a friend who does who could help you out! I decided to go with a black and pink design on mine, any color scheme works as long as you love it! Here is a link to how I made the labels if you want to make them or something similar.
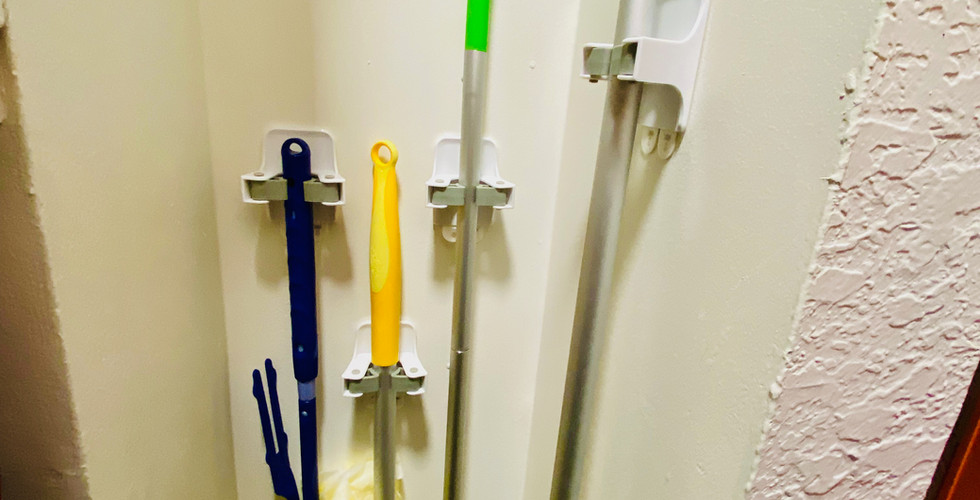
After reloading the pantry I tackled the tiny area for my broom & Swiffer storage. I'm actually really short so I wanted to store my Swiffers and their dusters in the same area at my height vs having to put them down from the high shelf. I found some great dispensers online like this one but they were too big for the space I had so I bought two snap lid plastic storage boxes that would fit and cut out my own ovals on the lids. I used a bit of cardboard to create a shelf inside so I could store two rows in each and then covered the lid with some vinyl I had, now it looks great and is totally functional. The snap on lids are so easy to remove and refill the box too. Here is a link to the step by step process to make your own.
To hang everything I used 3M removable tape products and brooms hangers, after the hours I spent filling in the holes from the old hangers I was not about to create in any new ones!! This also allowed me the opportunity to stagger items on the wall getting a lot more stored in this small space. To do this I measured the space then used masking tape to mark the measurements for top/bottom/left/right on the floor, I only used a few 2 inch pieces to note the edges of the area I had to stay within and then placed items around until I was happy with the layout before hanging them on the wall.
I've been using the new pantry for 3 months now and all I can say is I wish I had done this years ago!! When it's time to decide what's for dinner I can quickly come up with a meal, I can figure out what we need to buy in just a few minutes with very little effort, I find myself looking forward to making a list of mens for the week, I can rotate food and store more using the full height of the area for when I buy bulk to save more money too. Who knew just a few changes could make such a difference!
Note some links are affiliate, they do not cost you more money to use and may give me a small amount of income to help support my website blog.


Comments